Basic Piercing Care: How To Make A Sea Salt Soak
Body piercings are a personalized experience... What works for your body might not work for everyone else. Beyond everyone's individualized anatomy, each piercing requires a different technique, different tools, and a different piece of body jewelry for healing. Each of these techniques are performed by piercers who have their own style and finesse when it comes to their practice. Pretty quickly, it becomes apparent that the art of piercing is not an exact science; every sing piercing will be its own separate experience. There's no one, tried-and-true answer when it comes to a catch-all that works for everyone.
What we can agree on is this: piercing aftercare is integral to the long-term health of your piercing. Knowing the basics of aftercare can go a long way toward healing your piercing as quickly and as effectively as possible.
How Often Should I Be Cleaning?
It is generally agreed upon that new piercings should be cleaned at least once a day, but at most twice a day. Since everyone's body is different, you'll need to determine the frequency that works best for you. Do you have dry or sensitive skin? Then cleaning more frequently might chap or irritate your skin (which could complicate your healing time significantly).
Believe it or not, you can indeed overclean your piercings!
The best method for cleaning your piercings is to use a warm and gentle sea salt soak which can be easily made in the comfort of your own home!
How To Make A Sea Salt Soak
It's important to use sea salt when making your salt soak - iodized table salt has extra additives that can further irritate your piercing. Be sure to stay away from Epsom salt as well, which is an entirely different chemical formula and will not be therapeutic for healing.
Sea salt soaks are very simple to make. The most important part of the process is to make sure the salt to water ratio is correct.
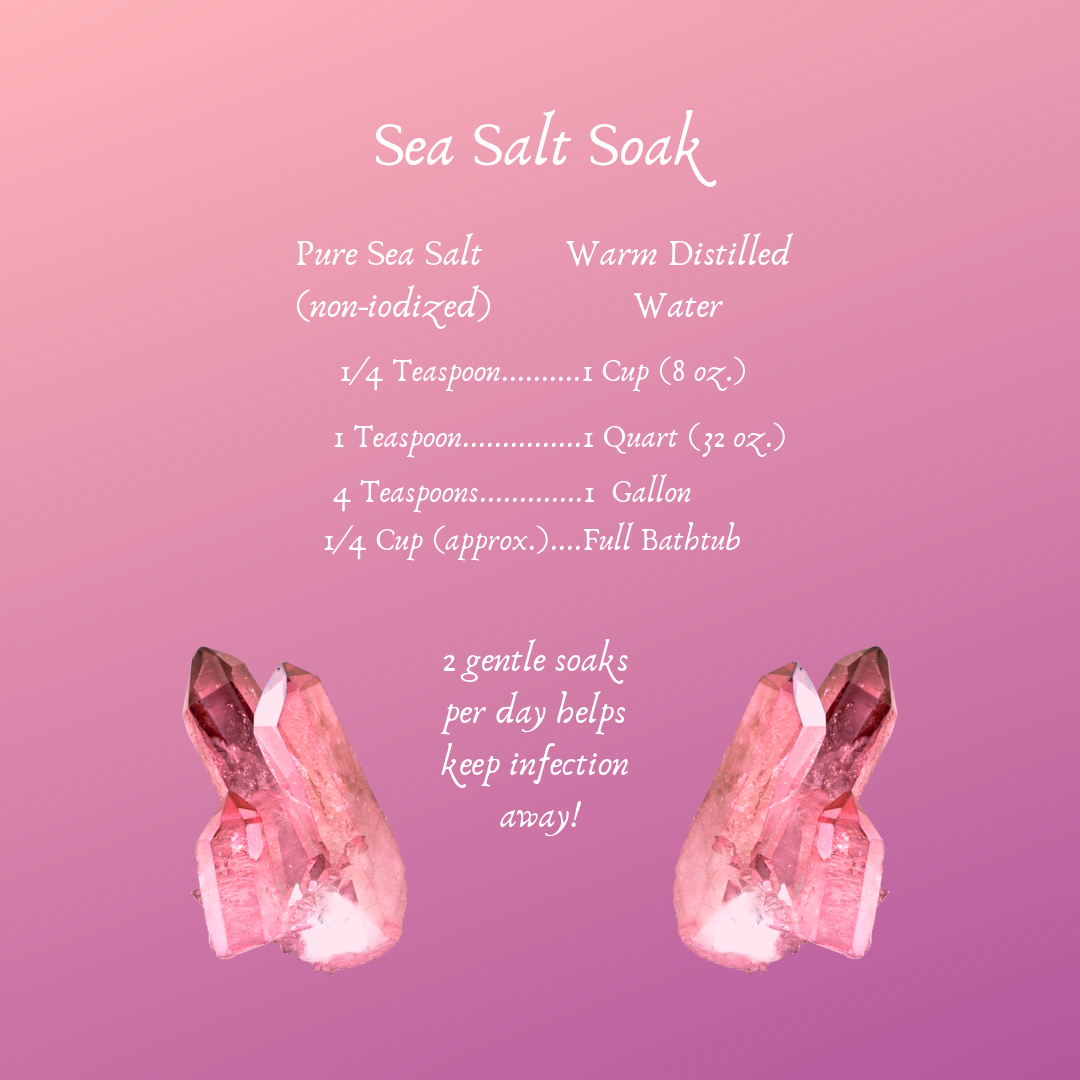
In a clean container, simply combine and stir warm water and sea salt in the following ratio:
1/4 teaspoon of salt to 1 cup of water
1 teaspoon of salt to 1 quart of water
4 teaspoons of salt to a gallon of water.
Don't forget that you can make a big batch of salt soak and keep it in the refrigerator for use throughout your aftercare.
How to Use Sea Salt Soaks
Fill a glass with your pre-made sea salt solution and warm it in the microwave (alternatively, you can heat this in a clean and sterile pot). This container can be as small as a shot glass, as long as you can physically place your piercing inside the container.
For nose rings; nipple piercings; and ear piercings, you should do your best to submerge the entire piercing in the solution. Press the container up against your skin (so that it "forms a seal"). Hold it there for approximately five minutes.
If you don't have a container that fits your piercing size, be sure to use a paper towel and gently lay it over the piercing without rubbing or wiping. Never use cotton swabs or cotton balls to clean your piercing - fibers could get trapped inside your piercing site!
Why Sea Salt Soaks?
Sea salt soaks are generally the most agreed-upon method when it comes to piercing aftercare.
It's not the salt soak itself that helps heal your piercing effectively. In fact, you shouldn't be thinking about putting anything on your piercing to help it heal. Aftercare isn't sped up by a topical; it's actually the act of flushing away dirt and bacteria that helps heal quickly.
Sea salt soaks have long been revered for their therapeutic effects on piercings. While irrigating your piercing, they will also hydrate your cells, flush out any nasty invaders, and can even help to relieve some of the pain or swelling associated with healing.
What Should I Avoid Putting on My Piercings
Salt soaks only! An occasional exception can be made for gentle soaps, but only at the advice of your professional piercer. Be sure to avoid:
Harsh Chemicals:
Rubbing alcohol, hydrogen peroxide, witch hazel, Bactine, and anything with triclosan in it is a HARD NO. These chemicals are not made to treat puncture wounds (like piercings). They will dry out your skin and irritate your piercing, which will negatively affect your healing time.
Essential Oils:
From Tea Tree Oil to Lavender oil, it's best to simply avoid essential oils altogether. They are often extremely concentrated and too powerful to place on a sensitive, healing area of the body. Although essential oils may be therapeutic in other ways, they should never be used on a healing piercing.
Contact Solution:
Technically, saline solution is very similar to sea salt soaks... But contact solution often has extra additives that are not formulated to be placed on healing piercings.
For more info on what NOT to put on your piercing - check out this blog here.
Add us on Snapchat: bodycandy.com
Add us on TikTok: @bodycandy


